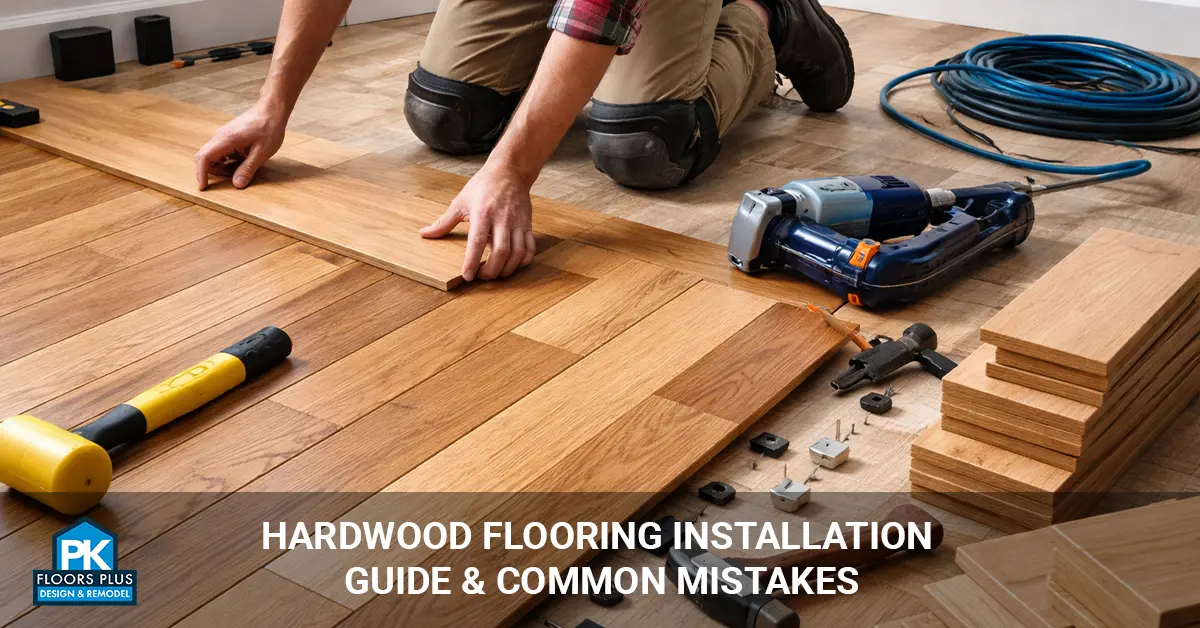
Installing hardwood flooring the right way is what makes it last for decades instead of failing early. Hardwood is strong and beautiful, but it reacts quickly to moisture, temperature changes, and poor preparation.
A good installation isn’t about speed. It’s about planning, prep, and using the right method for your space. Small mistakes like skipping acclimation or ignoring moisture can lead to gaps, squeaks, or buckling.
This guide walks you through the installation process step by step. It explains which method works best and points out the most common mistakes homeowners make, so you can avoid problems and get a floor that performs well for years.
Can You Install Hardwood Flooring Yourself?
Yes, you can install hardwood flooring yourself if the room layout is simple, the subfloor is flat and dry, and you’re comfortable using basic power tools. Straight rooms without stairs or complex cuts are the best candidates for DIY installation.
For concrete subfloors, stairs, wide planks, or complicated layouts, professional installation is usually the safer option and helps prevent costly mistakes.
What You Need Before Installing Hardwood Flooring
You need the right tools, materials, and preparation before installing hardwood flooring because skipping this step causes most installation failures. Taking time to prepare saves money and prevents long-term problems.
- Tools Required: You’ll need basic tools to get clean, accurate results. These include a tape measure, chalk line, miter saw, flooring nailer or stapler, hammer, spacers, level, and safety gear.
- Materials You’ll Need: The materials depend on the installation method, but most projects require hardwood planks, underlayment or a moisture barrier, fasteners or adhesive, trim, and transition pieces.
- Subfloor Requirements: The subfloor must be clean, dry, and flat before installation begins. Most manufacturers allow no more than a 3/16-inch height difference over 10 feet, and exceeding that can cause gaps, squeaks, or buckling.
Preparing the Subfloor (Most Important Step)
Preparing the subfloor is the most important part of installing hardwood flooring because it directly affects how long the floor will last. Even the best hardwood will fail if the subfloor isn’t ready.
- Check Level and Moisture: The subfloor must be level and within the manufacturer’s moisture limits before installation. Uneven or damp subfloors often lead to squeaks, gaps, warping, and loose boards.
- Concrete vs Wood Subfloors: Wood subfloors may need sanding, patching, or reinforcement to create a flat surface. Concrete subfloors require proper moisture testing and a vapor barrier to prevent moisture from damaging the hardwood.
- Why Moisture Testing Matters: Moisture testing is critical because hardwood absorbs moisture quickly. Installing hardwood over a damp subfloor almost always leads to buckling, cupping, or long-term damage.
Hardwood Flooring Installation Methods
The right installation method depends on the type of hardwood you’re using and the subfloor underneath it. Choosing the wrong method can lead to movement, noise, or damage.
- Nail-Down Installation: Nail-down installation is the most common method for solid hardwood over wood subfloors. It creates a strong, long-lasting floor but requires experience and the right tools.
- Glue-Down Installation: Glue-down installation works well over concrete and with some engineered hardwood floors. It provides a solid feel but costs more and leaves little room for mistakes.
- Floating Installation (Engineered Only): Floating installation is used only for engineered hardwood. The planks click together and sit over underlayment, making this method faster and more DIY-friendly.
- Which Method Is Best: Nail-down is best for solid hardwood on wood subfloors, glue-down is best for concrete, and floating installation is best for engineered hardwood and DIY projects.
If you’re unsure which material is right for your subfloor or installation method, understanding solid vs engineered hardwood flooring can help you avoid costly installation mistakes.
Step-by-Step Hardwood Flooring Installation Guide
Installing hardwood flooring correctly means following each step in the right order, because skipping one step can cause long-term problems. Every step builds on the one before it.
- Acclimate the hardwood in the room for 48–72 hours so it adjusts to the temperature and humidity.
- Prepare and clean the subfloor to ensure it’s flat, dry, and free of debris.
- Install a moisture barrier or underlayment based on your subfloor and installation method.
- Plan the layout and leave proper expansion gaps around walls and fixed objects.
- Install the first row straight and secure, since this row guides the rest of the floor.
- Continue laying boards, staggering joints to improve strength and appearance.
- Cut boards carefully for edges, doorways, and corners.
- Install trim and transitions to protect expansion gaps and finish the floor cleanly.
Taking your time with each step helps prevent gaps, buckling, and premature wear.
Common Hardwood Flooring Installation Mistakes to Avoid
Most hardwood flooring problems happen because of rushing or skipping preparation. These mistakes may not show up right away, but they almost always lead to issues later.
- Skipping acclimation, which causes boards to expand or shrink after installation
- Ignoring expansion gaps, leading to buckling or boards pressing against walls
- Installing over uneven subfloors, which creates movement, noise, and weak spots
- Failing to test for moisture increases the risk of warping and cupping
- Using the wrong installation method, which can cause long-term instability
- Not staggering plank joints, resulting in a weaker floor and a poor appearance
Avoiding these mistakes helps prevent gaps, buckling, squeaks, and premature damage, keeping your hardwood floor solid and quiet for years.
Expansion Gaps: Why They Matter
Expansion gaps are necessary because hardwood naturally expands and contracts with changes in temperature and humidity. Without these gaps, the boards have nowhere to move and can press against walls, causing buckling or lifting.
Most hardwood floors require a 3/4-inch expansion gap around the entire perimeter of the room. These gaps are later covered with trim or baseboards, allowing the floor to move safely without visible damage.
How Long Does Hardwood Flooring Installation Take?
Hardwood flooring installation usually takes 1–2 days per room, depending on preparation work and the installation method used. Simple layouts with good subfloors are quicker, while rooms that need leveling or moisture work take longer.
DIY installations often take more time, especially for first-time installers. For whole-house projects, installation can take a week or more, depending on the size and complexity of the job.
Post-Installation Tips to Protect Your Hardwood Floors
Protecting your hardwood floor after installation helps the boards settle and prevents early damage. The first few days are especially important.
- Walk lightly after 24 hours to avoid shifting boards
- Wait 48–72 hours before moving furniture back into the room
- Use felt pads under furniture to prevent scratches
- Avoid wet mopping for the first week to protect the finish and joints
Following these steps helps preserve the finish and keeps the joints tight and secure. Once the floor has settled, ongoing care becomes just as important as proper installation. Following the right routine for how to clean and maintain hardwood floors helps protect the finish, prevent moisture damage, and extend the life of your new flooring.
When to Hire a Professional Installer
You should hire a professional installer when the job involves complexity or higher risk. Professional installation helps prevent costly mistakes and protects your flooring investment.
Hire a pro if you’re installing over concrete, working with stairs, using wide planks, or need to keep a manufacturer warranty valid. Complex installations often cost more to fix than to install correctly the first time, making professional help the safer choice.
Final Thoughts
A successful hardwood flooring installation comes down to preparation, patience, and using the right method for your space. Taking time to acclimate the wood, prepare the subfloor, and avoid common mistakes makes a big difference.
When installed correctly, hardwood flooring provides decades of beauty, comfort, and long-term value for your home.