Another common type of flooring sweeping many households is the vinyl flooring as it is cheap, durable and also easy to maintain. It is available in a variety of styles and can strongly resemble wood or tile, which is why it is a good choice in any room. Your vinyl flooring should be kept in good condition by proper installation and cleaning to ensure that it lasts long and maintains its good appearance.
This guide is very easy and user-friendly to use in the installation of the vinyl floors as well as cleaning them. You can use the post to achieve beautiful, lasting results with your vinyl flooring, whether you are new to DIY projects or simply want easy steps to follow.
Understanding Vinyl Flooring Types
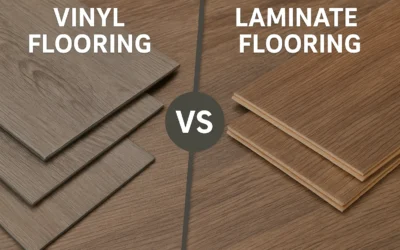
Vinyl flooring is a popular and commonly used type of flooring in homes and business. There are three major types of it: Vinyl Plank, Sheet Vinyl, and Luxury Vinyl Tile (LVT). Each of them has its own benefits that can be used in other places and requirements.
Various Vinyl Flooring.
Vinyl Plank:
The planking is made of vinyl that gives an appearance of wood. They are long lasting, water resistant, and they are available in a non-adhesive format, such as click-lock or glue-down. Vinyl planks have been applied to the living room, kitchen and basement, where you want to be hardwood and you have to be more resistant to moisture.
Sheet Vinyl:
Sheet vinyl is available in large continuous roll in form which forms a seamless, smooth floor. It is highly water-resistant and is suited to rooms with wet conditions like a bathroom or kitchen. Sheet vinyl is also typically attached to the surface to be very durable and produce a contemporary, smooth appearance without stitching.
Luxury Vinyl Tile (LVT):
LVT is a replica of natural stone or ceramic tile yet it is comfortable and durable. It is available in tile formats and is more likely to be either a click-lock or glued-down. LVT works well in places that have medium and high traffic of people like hallways and kitchens.
Tools And Materials You Will Need To Install Vinyl Flooring
| Tool/Material | Purpose | Additional Notes |
| Tape Measure | Measure room dimensions | Ensure accurate cuts and placement |
| Utility Knife | Cutting vinyl sheets, planks, or tiles | Use sharp blades for clean cuts |
| Trowel (notched or flat) | Applying adhesive or leveling compound | Different types are used based on installation method |
| Floor Roller or Seaming Roller | Pressing vinyl onto surface | Ensures good adhesion and smooth surface |
| Spacers | Maintaining expansion gaps | Prevents buckling or warping |
| Adhesive (if needed) | Gluing vinyl sheets or planks | Use specific adhesive suitable for vinyl flooring |
| Jigsaw or Saw | Cutting around corners or fixtures | For precise shape fitting |
| Knee Pads | Comfort and protection during installation | Essential for prolonged kneeling |
| Chalk Line | Marking straight lines | Ensures straight, even layout |
| Cleaning Supplies | Cleaning subfloor and vinyl surface | Broom, vacuum, mop, and cleaning solutions |
How To Install Vinyl Flooring: Step-By-Step Installation Guide?
Vinyl flooring is an excellent method of updating your room. The following is a basic source of advice on doing it right.
Step 1: Prepare the Surface
Begin with the floor surface cleaning. Ensure that it is dust or debris free, dry, and smooth. Seal any cracks or holes so as to have an even base.
Step 2: Measure and Cut
Measure the room so as to work out the quantity of vinyl required. In the case of vinyl planks or tiles, make sure that there is a slight space at the edges to allow expansion. According to the measurements, cut the vinyl pieces with a utility knife or saw.
Step 3: Lay the Vinyl
In the case of sheet vinyl, roll-out the material and place it in the room. When using adhesive, use a trowel to apply the adhesive to the floor followed by laying the vinyl on the adhesive. In the case of vinyl planks or tiles, you would begin with a corner and either use clicks or glues to attach them together, as per the instructions of the producer.
Step 4: Secure the Flooring
Use a floor roller to roll over the vinyl and make it sink in. This assists in eliminating air bubbles and also adhesion is strong. Plank expansion gaps or tile expansion gaps Use spacers to maintain the right expansion gaps.
Step 5: Finishing Touches
Cutter no matter then cut off the extra vinyl around the edges with a sharp knife. Apply baseboards or moldings to seal the expansion spaces to make it look nice. Wipe your new floor and allow any adhesives to dry as per instructions.
How To Clean Vinyl Plank Flooring: Daily And Routine Cleaning Tips
Vinyl plank flooring is simple to maintain, clean and therefore appears to be of good appearance over a significant duration.
Daily Cleaning
Begin with cleaning (sweeping or vacuuming the floor) on a daily basis. A vacuum or soft broom that is used is a hard floor vacuum. This eliminates dirt and minute dust, which may leave scratches.
Routine Cleaning
Wipe with a damp microfiber mop every one week or as required. Caution not to wet down the floor with water. Rather, squeeze the mop thoroughly and pour a pH-neutral cleaner developed on vinyl floors. Use mop to wipe dirt and spills.
Spill and Stain Care
Immediate clean-up of spills to avoid stains. On stubborn stains, apply a small amount of rubbing alcohol or a cleaner made especially to clean vinyl to a soft cloth. Caution should be taken against rough chemicals that may harm the floor.
What to Avoid
Abrasive cleaners, bleach, ammonia, or steam cleaners should not be used on the vinyl planks. They are able to erode the protective finish. Moreover, do not use wax or polish because it will leave a sticky residue.
Maintenance and Longevity Tips
Here are simple maintenance and longevity tips to keep things working well for a long time:
- Regular Cleaning: Keep equipment and surfaces clean to avoid dirt buildup, which can cause damage over time.
- Proper Storage: Store items in dry, cool places to prevent rust, warping, or other damage.
- Routine Checks: Inspect tools and machines regularly to spot any wear and tear early.
- Use as Intended: Follow manufacturer instructions to avoid unnecessary stress or damage.
- Timely Repairs: Fix small problems right away before they grow into bigger issues.
- Lubrication: For machines, apply oil or grease where needed to reduce friction and wear.
- Avoid Overloading: Don’t put too much weight or pressure on items; this shortens their lifespan.
- Protect from Elements: Shield from extreme weather, moisture, and sunlight to prevent deterioration.
- Keep Manuals Handy: Refer to user guides for specific care and maintenance steps.
- Stay Updated: For tech and machines, keep software or firmware updated if applicable.
By following these tips, you can help your belongings last longer and perform better with less trouble. Regular care saves money and time in the long run.
Conclusion
Installation and cleaning of your vinyl flooring are essential to enable your flooring to last and maintain a good appearance. By spending some time to clean your floor properly and clean it regularly you can save money and be able to save on time as well. The installation can be done by beginners, however, you need to be very careful and patient and follow the steps properly.
You need not be afraid of taking this project and reap the benefits of a beautiful floor. Should this guide be useful to you, share it with your friends and family. You can also post comments with your inquiries or flooring experience, and I welcome your feedback at all times.
FAQs
Do I Need Underlayment For Vinyl Flooring?
It depends on the subfloor and product type. Some vinyl planks come with built-in underlayment, while others may need a separate one.
Can I Use A Steam Mop On Vinyl Flooring?
No, avoid steam mops as heat and moisture can damage vinyl planks and weaken the adhesive.
How Do I Remove Stains From Vinyl Floors?
Use a soft cloth with warm water and mild detergent. For tough stains, try a bit of baking soda paste.